- New Home Server
- Installing Proxmox
- Proxmox Quirks & Configurations
- Shiny New DC
- DNS, DHCP, and Redundancy
- Active Directory Structure and Config
- File server replication with Robocopy
- Windows shares on Linux
- Install Plex on CentOS
- Ubiquiti UniFi Controller
- Centreon Monitoring
- Centreon 2 – Electric Boogaloo
As I mentioned in a previous post, the purpose of this new server was to replace the dinosaur that had been faithfully operating non-stop for roughly 15 years. It was one of the first desktop PCs I had ever built from parts, and had been retired from desktop duty. At the time, I was working for a small engineering firm with around 30 users as SysAdmin/Sole IT Support and my budget was next to nothing. Therefore, my test/dev environment was also pretty much non-existent. They were running several Windows 2000 servers, and I was looking to upgrade them to Server 2003, so I decided to drag this old box into service as a tester.
As a result, I ended up with a Server 2003 box acting as Domain Controller, DNS, DHCP, as well as File & Print server. It ran like that up until around 2 months ago… the only issues I can recall having were the onboard video and NIC giving up the ghost at one point and being replaced with PCI cards. Other than that, nary a hiccup… I think I got my money’s worth out of that one. So, here I am in 2017, getting ready to add a DC running Server 2012 R2… needless to say, I needed to jump through a few hoops to get things where they needed to be.
The first of which was to bring my domain and forest functional levels up from 2000 to 2003, which is the minimum level supported by Server 2012 R2. To do that, open up Active Directory Users & Computers and right click the root of your domain and choose “Raise Domain Functional Level”. Then open up Active Directory Domains & Trusts, right click Active Directory Domains and Trusts and choose “Raise Forest Functional Level”.
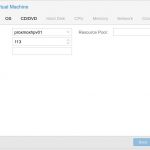
Now I was ready to create my first VM in Proxmox. To do so, I chose the “Create VM” button in the web interface, and you then get presented with the following dialog. Here you will need to specify a Name and click next.
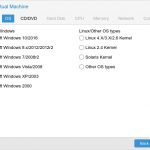
On the next screen you’ll need to choose your OS (In my case, Windows 2012 R2)
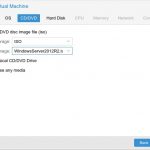
Choose your installation media (I uploaded a Server 2012 ISO into ISO storage in Proxmox previously).
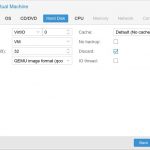
Specify the hard disk parameters. I chose VirtIO, this will give the best performance under KVM, however you will have to load drivers during the install in order to make this work… I’ll cover that a bit later in the post. I made the disk 100 GB and checked off the discard box (this allows the drive to be trimmed to recover space during delete operations).
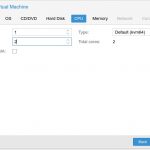
On the next dialog you’ll need to specify processor information, DCs (especially one on a home network) don’t require a lot of juice to run, so I set it to a single socket, 2 core vCPU.
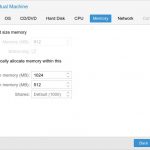
For memory, I set it to auto allocate anywhere between 512 MB and 2 GB. The highest I’ve ever seen it go was 80% of that in the Proxmox monitoring.
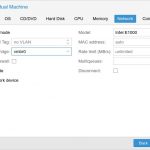
Lastly you will choose your network adapter. I’ve seen others suggest that the best performance comes from choosing VirtIO here. However I had issues getting the drivers to load during the install, and I didn’t want to slipstream them into my ISO, so I opted to stick with the Intel E1000. It’s supported “out of the box” and presented no problems during the install. After installation was complete, I did change over to the VirtIO adapater and loaded the drivers for it from within windows. I ran some before and after tests with iperf, but at least in my case, I didn’t notice any real performance difference between the two. However, as always, YMMV.
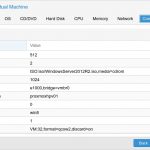
Next you will just get a summary of all selected options, verify everything is good and click finish and the VM will be created, but don’t boot it up just yet.
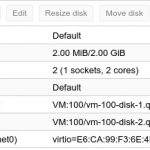
As I alluded to earlier, in order to use the VirtIO SCSI interface for your storage, you will need to load the drivers during the install. An ISO containing them can be downloaded from The Fedora Project and are signed by Red Hat (but not WHQL, this allows them to work for 64 bit windows, but you still must accept a warning to get them to install). I downloaded the ISO and then uploaded it into my Proxmox ISO storage location. At this point, I needed to click on my newly created VM and then go to Hardware, and then add a new CD/DVD Drive.
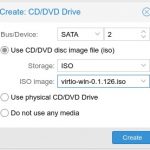
Then choose SATA device type, pick my Proxmox ISO storage, and then select the VirtIO ISO image that was previously uploaded.
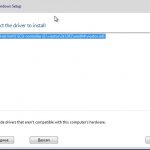
Now I was ready to boot the VM and proceed with the install, this goes just like any other Windows install with the exception of loading the VirtIO drivers. It will say no storage devices were find, same as you would get when needing to load raid drivers and you will have to choose to load a driver. Once the file navigator comes up you’ll need to go to the CD drive that the VirtIO ISO was loaded into and navigate to viostor > 2k12r2 > amd64 folder. Upon selecting that folder, it should show the Red Hat VirtIO SCSI Controller driver as in the screenshot below:
Once that is loaded, your virtual disk will show up and you can the proceed with the install as usual. At this point, it’s time to assign the server an IP address and join it to the existing domain. Since my previous Server 2003 DC was also the DNS and DHCP server for my network, all of my devices were configured to use its IP of 192.168.0.250 as their DNS server address. Since I didn’t necessarily want to change this on every device that wasn’t configured for DHCP, I decided to recycle that IP for the new DC as well. So for the time being I assigned it a temporary IP address of 192.168.0.200, then joined to my existing domain…. sky.net. That’s right, my domain will one day become sentient and seek to destroy me, but for now it makes me chuckle to use it. (For the record, I do not own this domain and only use it internally on my own personal network).
With Server 2012 R2 it is no longer necessary to run adprep or dcpromo, it pretty much handles everything when you add the DC role. After the role installation is complete, there will be a message in Server Manger asking to promote to Domain Controller. I just needed to specify that the server would handle DNS and also be a Global Catalog, set the Directory Services Restore Mode password, choose to replicate from my existing DC, and the rest of the process is automated from there. After configuration is complete, the server reboots, and the new DC is fully operational.
Now I just needed to transfer the FSMO roles. First step was to open up Active Directory Users & Computers and right click on the domain name and choose Operations Masters option. Here you will see 3 out of 5 FSMO roles. RID, PDC, and Infrastructure. Each of these had my 2003 DC listed as current, and the option to change to my new 2012 R2 DC. I was able to make these changes with no issues. Next I needed to open up Active Directory Domains & Trusts. Right click the Forest for my domain and choose Operations Master, and same as before it showed the 2003 DC and had the option to change to the 2012 R2 DC.
The final step is to change the Schema master. In order to do this, you must first register the DLL to be able to add the snap-in to the MMC console. Open up Run and type in regsvr32 schmmgmt.dll and hit OK. You should receive a success message. Then type in mcc and hit ok to launch a fresh MMC console, and go to file > add/remove snap-in and choose Active Directory Schema. After that launches, you can right click on Active Directory Schema and choose “Change Active Directory Domain Controller”, choose your new DC in the next window and click OK. You will get a message stating that the snap-in is not connected to the Schema Master and you won’t be able to perform any changes, just hit OK here. Then right click Active Directory Schema again and choose Operations Master. Here you should see the old DC with an option to change to the new DC.
Give the changes time to replicate, I didn’t have much information stored in Active Directory, so this didn’t take long on my end. After some time you can run the following command on your new DC to verify that all roles have been transferred:
|
1 |
netdom query fsmo |
and all 5 roles should show as the new Domain Controller.
I was now ready to demote the 2003 DC, this is a straight forward process… I just needed to run dcpromo on the server and choose to remove Active Directory Domain Services and follow the prompts. Afterwards it will reboot and come back up as just a normal member server. I left this server running for about a week after the demotion, mostly just because I needed to copy the content from it onto the new file server and since I elected to organize the structure a bit better and shuffle the content around, I needed to wait until my initial backup was complete.
Once all the data had been copied, I went ahead and removed the old server from the domain and shut it down for good. I then changed the IP on my new DC to 192.168.0.250. And as a final step, went ahead and raised the forest/domain functional levels up to 2012 R2.
One last thing that needed to be done was to setup the PDC as an authoritative time source, and configure it to sync with an external NTP pool. To do so still requires editing the registry as it has in previous versions of windows server. You’ll want to fire up regedit and navigate to:
|
1 |
HKEY_LOCAL_MACHINE\SYSTEM\CurrentControlSet\Services\W32Time\Parameters\Type |
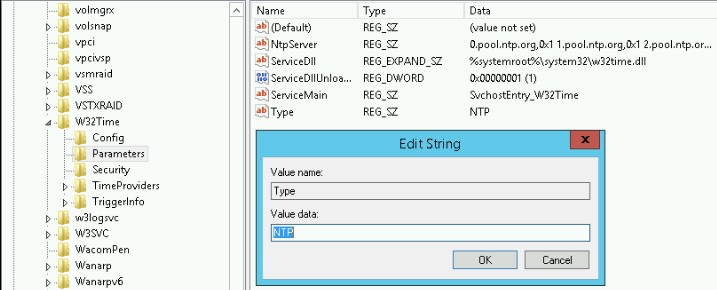
Right click Type in the right pane and modify it to have a value of “NTP”
You can also add your external time sources, as seen in the screenshot above you will modify NtpServer and set the values, make sure to append ,0x1 to each server name, or the changes will not take affect. I chose to use the ntp.org pool on my server.
Then navigate to:
|
1 |
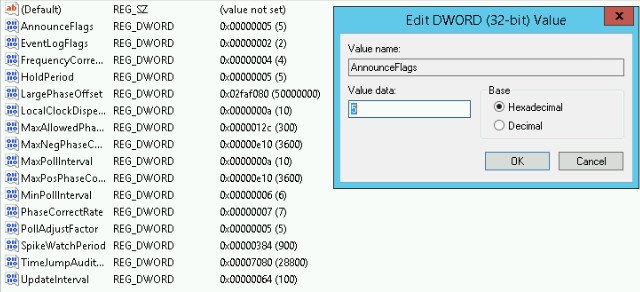
HKEY_LOCAL_MACHINE\SYSTEM\CurrentControlSet\Services\W32Time\Config\AnnounceFlags |
Right click on AnnounceFlags and modify the value to 5
You also need to set both MaxPosPhaseCorrection and MaxNegPhaseCorrection, as seen in the previous screenshot, I set the value for each to 3600 (1 Hour).
The last action to take is to enable the NTP server, to do so, go to:
|
1 |
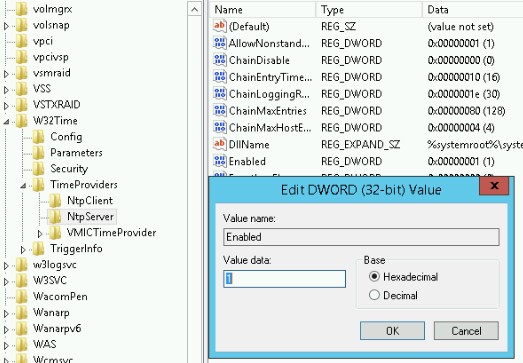
HKEY_LOCAL_MACHINE\SYSTEM\CurrentControlSet\Services\W32Time\TimeProviders\NtpServer |
Right click “Enabled” and change the value to “1”.
Now to make the changes take affect, open up an Administrator cmd prompt/powershell and type in:
|
1 |
net stop w32time && net start w32time |
The DC will now announce itself as an authoritative time source, and all domain members should sync with it.
In the next post I will discuss the changes that I made to DNS, and also standing up the secondary DC and configuring DHCP failover.

Leave a Reply