What is a container, why would you use a container instead of a virtual machine? For those who may not know, I’ll briefly go over my understanding of these questions. Containers use the kernel of the host they’re running on, they require just enough of an operating system and supporting files to run and that’s it. Generally, you can fit 2-3 times as many applications on single server with containers as you could running traditional virtual machines. This is because with a VM not only are you running a full fledged operating system, you’re also running virtual equivalents of each individual piece of hardware being emulated for that virtual machine. All of that can quickly add up to large physical resource consumption on your server.
A container is more than just a chroot jail, but less than an actual virtual machine, and they excel greatly at allowing you to run a single application and have that installation be portable as well. The container will be as close as possible to a standard Linux installation, but will not require its own kernel. LXC packages can be had for most Linux distributions through the usual sources. I’m using it via Proxmox, which is based on Debian Stretch.
In general, you only want to use containers to run a single service or application. They’re meant to be powered on and off quickly, which makes them great for development purposes. In my Proxmox environment, I’m running seven containers, each containing their own application. Previously I was running VMware ESXi, with full VMs, and would combine several of these services on a single virtual machine. Having them broken out individually the way I do now provides several advantages. Mainly the ability to take one of the applications/services down without affecting the rest. I can also take individual backups of each container. Currently they’re all running CentOS 7, but I could have any number of different distributions running as well if I chose to do so. There is also the speed of deployment, from 0 to running container takes literally seconds.
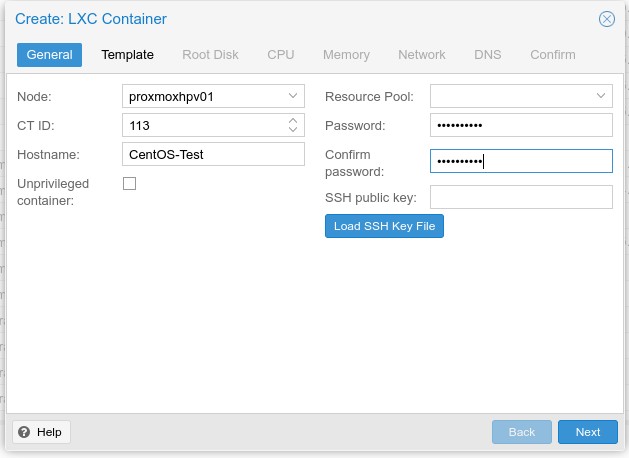
The following is an example of the process used to create a container in Proxmox. Simply click the “Create CT” button on the top bar. You will be greeted with a dialog box with a series of configuration options. The node and CT ID should already be filled in for you. Next you will specify a Hostname, root password, and load an SSH key if desired.
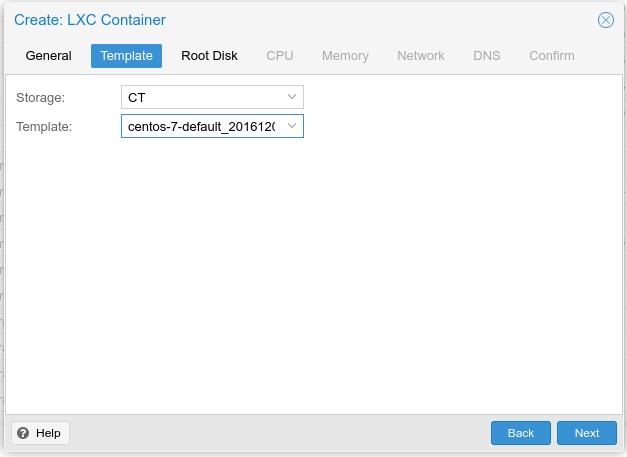
Choose a container template to use, I covered how to obtain available templates for Proxmox in this post. In my case, I’ll be using CentOS 7.
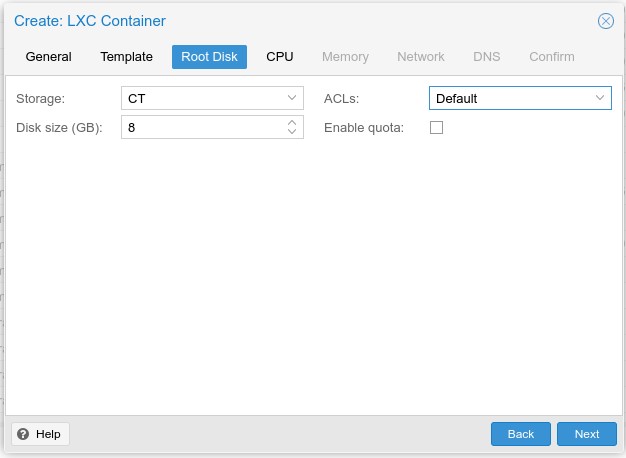
Specify storage details…. disk size, quota, acls.
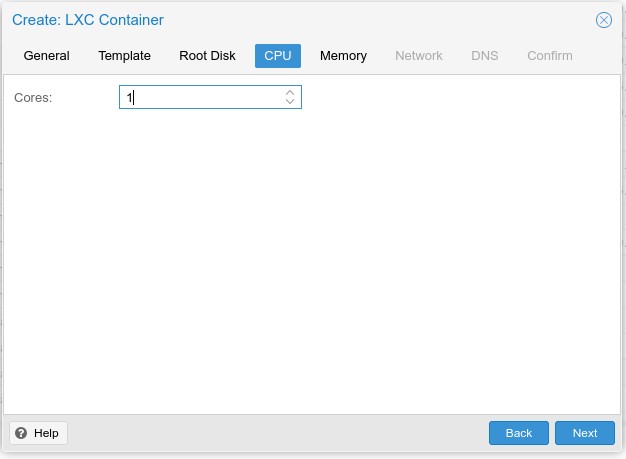
Choose the number of CPU cores to use:
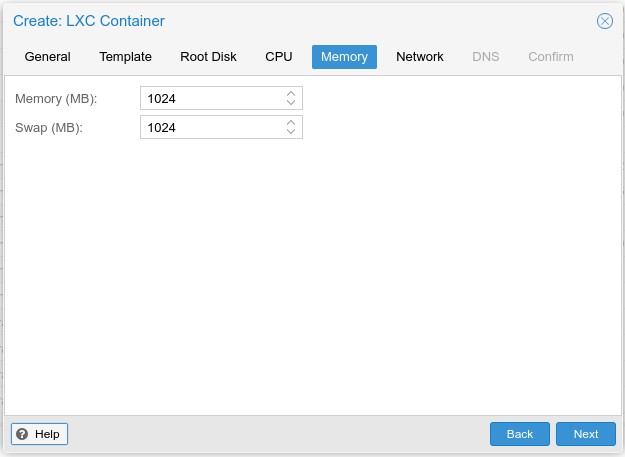
Specify the available memory and swap size:
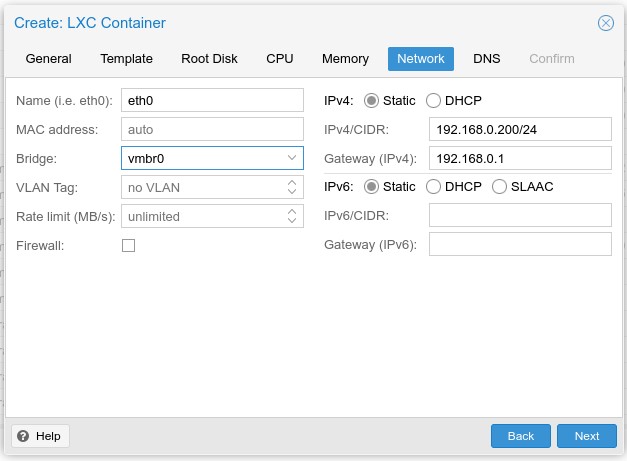
Configure the network, in my case I’m only using these containers for servers on an IPv4 network, so everything is setup static and IPv6 is ignored.
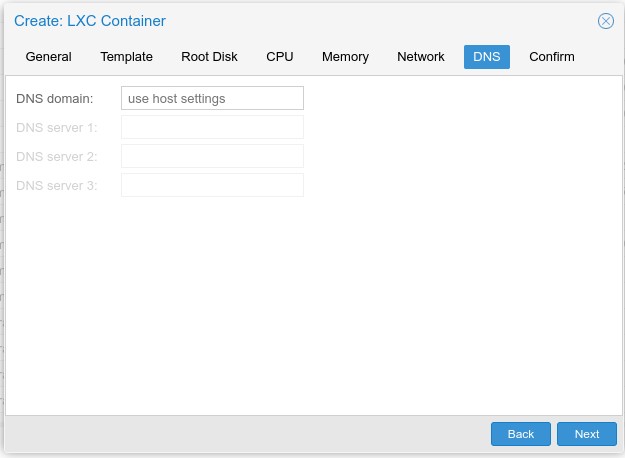
For DNS, I just have them use the Host’s settings:
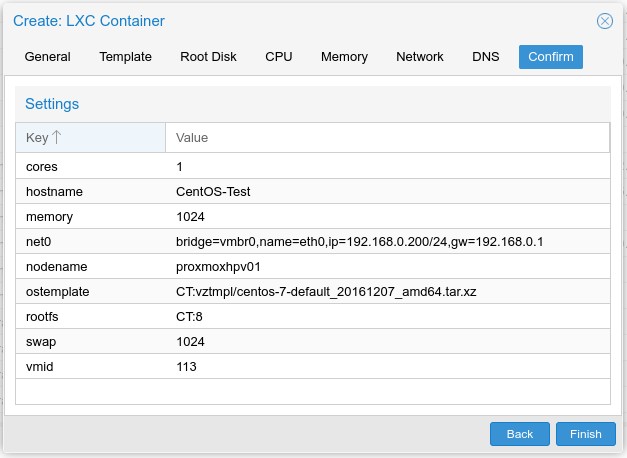
Confirm all the values you have entered, and when you are satisfied that everything is good, click finish to create the container with your specified settings.
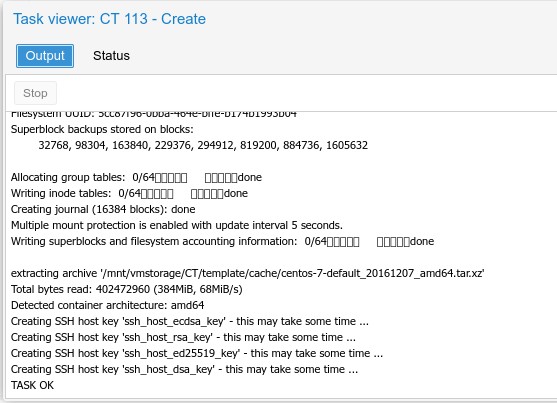
A window will pop up similar to the screenshot below with CT creation status, once you get the TASK OK at the bottom, that means creation is done and you are ready to start the container.
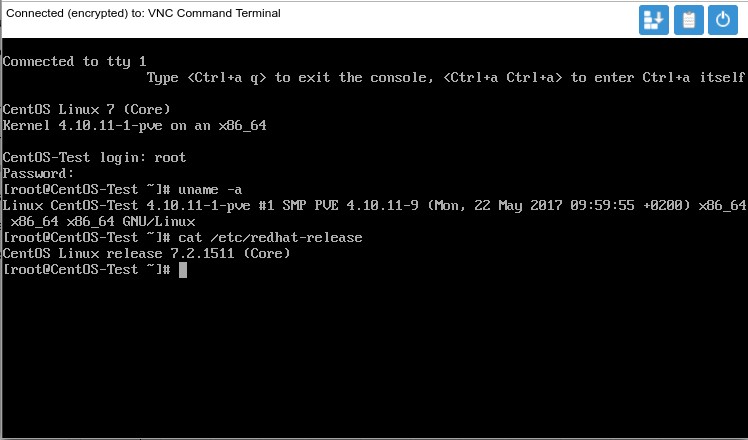
Congratulations, you have now created your first container:
If you would like more specifics on how I’m using containers in my environment, feel free to check out my article series on building and setting up my new home server.

Leave a Reply